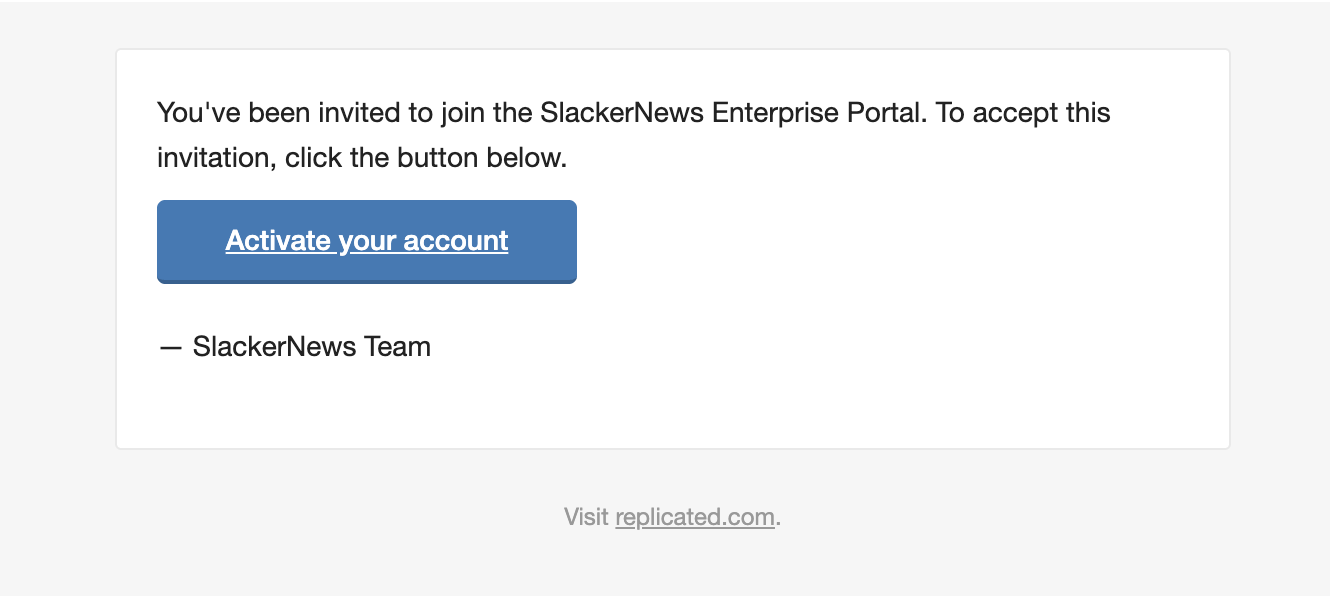
 [View a larger version of this image](enterprise-portal-invitation-email.png)
### Sign up for a self-service account
If self-service sign-ups are enabled for the application, users can create an account in the Enterprise Portal without being invited. The primary use case for self-service account creation is to sign up for a trial or community version of the software.
:::note
For information about how to enable self-service sign-ups from the Vendor Portal, see [Enable Self-Service Sign-Ups](/vendor/enterprise-portal-self-serve-signup).
:::
To sign up for a self-service account and log in to the Enteprise Portal:
1. Go to the sign-up page URL.
:::note
For information about how to find the unique sign-up URL in the Vendor Portal, see [Share Your Sign-Up URL](/vendor/enterprise-portal-self-serve-signup#share-trial-url) in _Enable Self-Service Sign-Ups_.
:::
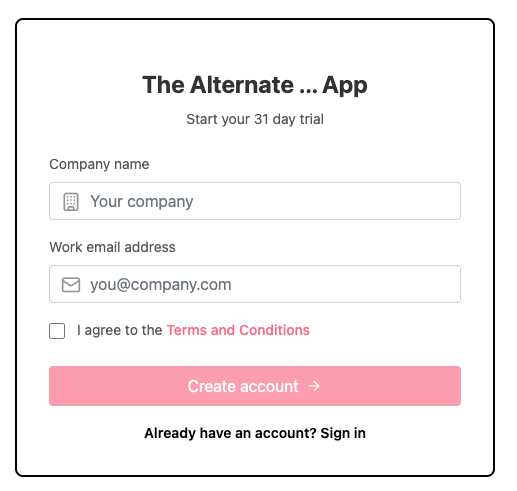
1. Enter your company name and email address, agree to the terms and conditions, and click **Create account**.
The following shows an example of a self-service sign-up page for an application:
[View a larger version of this image](enterprise-portal-invitation-email.png)
### Sign up for a self-service account
If self-service sign-ups are enabled for the application, users can create an account in the Enterprise Portal without being invited. The primary use case for self-service account creation is to sign up for a trial or community version of the software.
:::note
For information about how to enable self-service sign-ups from the Vendor Portal, see [Enable Self-Service Sign-Ups](/vendor/enterprise-portal-self-serve-signup).
:::
To sign up for a self-service account and log in to the Enteprise Portal:
1. Go to the sign-up page URL.
:::note
For information about how to find the unique sign-up URL in the Vendor Portal, see [Share Your Sign-Up URL](/vendor/enterprise-portal-self-serve-signup#share-trial-url) in _Enable Self-Service Sign-Ups_.
:::
1. Enter your company name and email address, agree to the terms and conditions, and click **Create account**.
The following shows an example of a self-service sign-up page for an application:
 [View a larger version of this image](/images/self-serve-signup-screen.png)
1. Go to your email account and open the automated account creation email. Follow the link provided in the email to log in.
### About SAML logins (Alpha) {#about-saml}
:::note
SAML Authentication to the Enterprise Portal is Alpha and subject to change. To access this feature, a feature flag must be enabled for your team. For more information, reach out to your Replicated account representative.
:::
When SAML authentication is enabled and configured for your Enterprise Portal team, you can log in with your single sign-on (SSO) credentials either through your SAML Identity Provider (IdP) or the Enterprise Portal. For more information about how to configure SAML, see [Configure SAML Authentication (Alpha)](#saml) below.
#### Just-in-time user provisioning
The first time that you attempt to log in with SAML using your SSO credentials, if you do not already have an Enterprise Portal account, then your account is automatically created using just-in-time (JIT) user provisioning. JIT is handled differently depending on if you attempt to log in through your IdP or the Enterprise Portal:
* IdP-initiated SAML login attempts always allow for JIT user provisioning
* Enterprise Portal-initiated SAML login attempts allow for JIT user provisioning if your email address has already been invited to the team. See [Invite or Delete Users](#invite-or-delete-users) below.
## View install and update instructions
This section describes how to view install and update instructions in the Enterprise Portal.
The install and update instructions available in the Enterprise Portal are automatically generated based on the install types and options enabled in the customer's license. For more information about managing the installation types and options, see [Manage Install Types for a License](/vendor/licenses-install-types).
### View install instructions
To view install instructions in the Enterprise Portal:
1. Log in to the Enterprise Portal and go to **Install**.
1. On the panel on the left, if there are multiple installation types available for the customer's license, select the installation type to use (Helm or Embedded Cluster).
The installation options displayed in the Enterprise Portal are based on the customer's license. For more information, see [Manage Install Types for a License](/vendor/licenses-install-types).
1. Follow the instructions provided to install. Status indicators track your progress throughout the installation.
If you exit the Enterprise Portal before completing the installation, you can resume the installation process by clicking **Continue installation** on the **Install** page, as shown below:

[View a larger version of this image](/images/enterprise-portal-continue-install.png)
### View update instructions
To view update instructions in the Enterprise Portal:
1. Log in to the Enterprise Portal and go to **Update**.
For any online instances, the Enterprise Portal displays an **Update available** button when a new version is available.
1. If an **Update available** button is displayed, click it to view and follow the update instructions for the given instance.
## View instance records
Users can view their active and inactive instances in the Enterprise Portal, including the instance status and other details.
:::note
Air gap instance records do not appear in the Enterprise Portal until the user adds a record by either uploading a support bundle for the instance or manually entering instance information. See [Create an Air Gap Instance Record](#create-an-air-gap-instance-record) below.
:::
### View active and inactive instances
To view instances in the Enterprise Portal:
1. In the Enterprise Portal, go to **Updates**.
1. Under **Active Instances**, view details about the active instances. Select **View inactive instances** to view details about inactive instances.

[View a larger version of this image](/images/enterprise-portal-instance-details.png)
The following table describes the instance details available on the **Updates** page:
[View a larger version of this image](/images/self-serve-signup-screen.png)
1. Go to your email account and open the automated account creation email. Follow the link provided in the email to log in.
### About SAML logins (Alpha) {#about-saml}
:::note
SAML Authentication to the Enterprise Portal is Alpha and subject to change. To access this feature, a feature flag must be enabled for your team. For more information, reach out to your Replicated account representative.
:::
When SAML authentication is enabled and configured for your Enterprise Portal team, you can log in with your single sign-on (SSO) credentials either through your SAML Identity Provider (IdP) or the Enterprise Portal. For more information about how to configure SAML, see [Configure SAML Authentication (Alpha)](#saml) below.
#### Just-in-time user provisioning
The first time that you attempt to log in with SAML using your SSO credentials, if you do not already have an Enterprise Portal account, then your account is automatically created using just-in-time (JIT) user provisioning. JIT is handled differently depending on if you attempt to log in through your IdP or the Enterprise Portal:
* IdP-initiated SAML login attempts always allow for JIT user provisioning
* Enterprise Portal-initiated SAML login attempts allow for JIT user provisioning if your email address has already been invited to the team. See [Invite or Delete Users](#invite-or-delete-users) below.
## View install and update instructions
This section describes how to view install and update instructions in the Enterprise Portal.
The install and update instructions available in the Enterprise Portal are automatically generated based on the install types and options enabled in the customer's license. For more information about managing the installation types and options, see [Manage Install Types for a License](/vendor/licenses-install-types).
### View install instructions
To view install instructions in the Enterprise Portal:
1. Log in to the Enterprise Portal and go to **Install**.
1. On the panel on the left, if there are multiple installation types available for the customer's license, select the installation type to use (Helm or Embedded Cluster).
The installation options displayed in the Enterprise Portal are based on the customer's license. For more information, see [Manage Install Types for a License](/vendor/licenses-install-types).
1. Follow the instructions provided to install. Status indicators track your progress throughout the installation.
If you exit the Enterprise Portal before completing the installation, you can resume the installation process by clicking **Continue installation** on the **Install** page, as shown below:

[View a larger version of this image](/images/enterprise-portal-continue-install.png)
### View update instructions
To view update instructions in the Enterprise Portal:
1. Log in to the Enterprise Portal and go to **Update**.
For any online instances, the Enterprise Portal displays an **Update available** button when a new version is available.
1. If an **Update available** button is displayed, click it to view and follow the update instructions for the given instance.
## View instance records
Users can view their active and inactive instances in the Enterprise Portal, including the instance status and other details.
:::note
Air gap instance records do not appear in the Enterprise Portal until the user adds a record by either uploading a support bundle for the instance or manually entering instance information. See [Create an Air Gap Instance Record](#create-an-air-gap-instance-record) below.
:::
### View active and inactive instances
To view instances in the Enterprise Portal:
1. In the Enterprise Portal, go to **Updates**.
1. Under **Active Instances**, view details about the active instances. Select **View inactive instances** to view details about inactive instances.

[View a larger version of this image](/images/enterprise-portal-instance-details.png)
The following table describes the instance details available on the **Updates** page:
| Field | Description |
|---|---|
| Instance ID | The unique identifier for the instance. |
| Version | The application version installed. |
| Instance status | The status of the instance, based on the status informers configured for the application. For more information, see [Enable and Understand Application Status](/vendor/insights-app-status). |
| First check-in | The timestamp when the instance first sent data to the Vendor Portal. |
| Last check-in | The timestamp when the instance most recently sent data to the Vendor Portal. |
| First ready | The timestamp when the instance first reached a ready state. For more information about the ready state, see [About Resource Statuses](/vendor/insights-app-status#resource-statuses) in Enable and Understand Application Status. |
| Instance labels | Any labels applied to the instance. |
 [View a larger version of this image](/images/enterprise-portal-create-air-gap-instance.png)
1. In the **Extract instance info from a support bundle** dialog, upload the support bundle and click **Upload bundle**:
[View a larger version of this image](/images/enterprise-portal-create-air-gap-instance.png)
1. In the **Extract instance info from a support bundle** dialog, upload the support bundle and click **Upload bundle**:
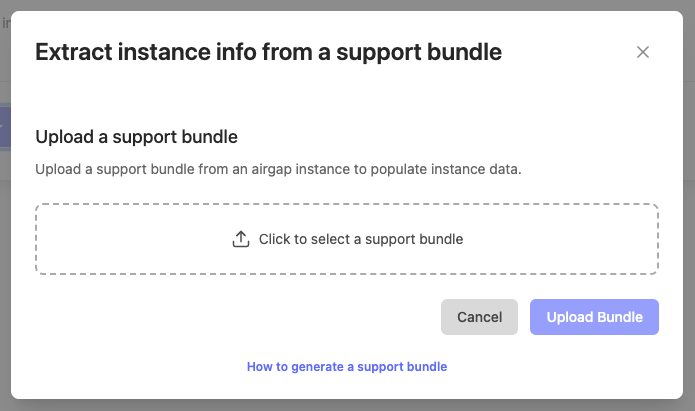 [View a larger version of this image](/images/enterprise-portal-extract-air-gap-instance-bundle.png)
#### Manually create an air gap instance record
To create an air gap instance record manually:
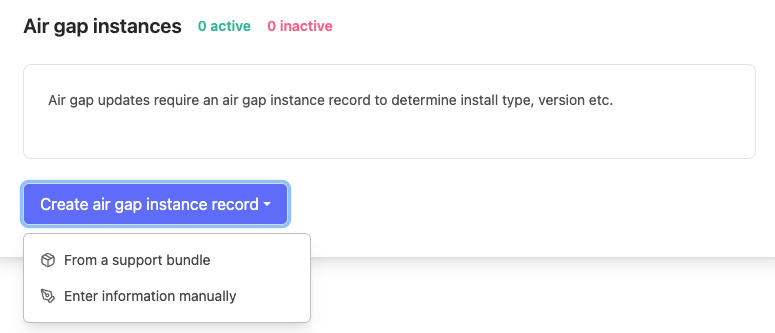
1. On the **Update** page, under **Air gap instances**, click **Create air gap instance record > Enter information manually**.
[View a larger version of this image](/images/enterprise-portal-create-air-gap-instance.png)
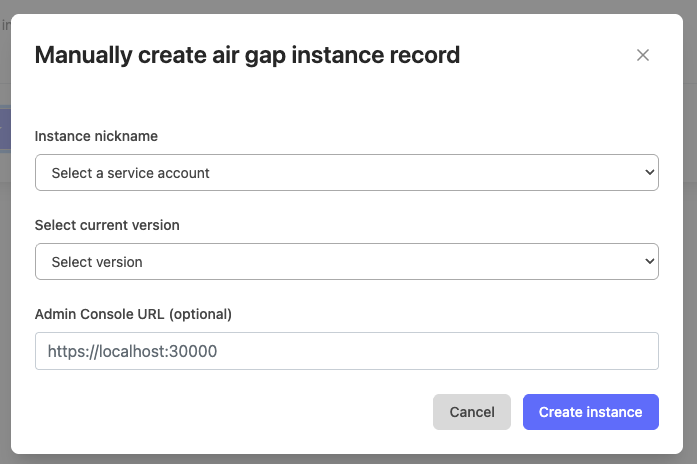
1. In the **Manually create air gap instance record** dialog, complete the fields and click **Create instance**.
[View a larger version of this image](/images/enterprise-portal-extract-air-gap-instance-bundle.png)
#### Manually create an air gap instance record
To create an air gap instance record manually:
1. On the **Update** page, under **Air gap instances**, click **Create air gap instance record > Enter information manually**.
[View a larger version of this image](/images/enterprise-portal-create-air-gap-instance.png)
1. In the **Manually create air gap instance record** dialog, complete the fields and click **Create instance**.
 [View a larger version of this image](/images/enterprise-portal-manually-create-air-gap-instance.png)
## View release history
To view the release history in the Enterprise Portal:
1. In the Enterprise Portal, go to **Release History**.
1. In the **Version History** panel on the left, select a version to view details about the given release.
## View license details
Customers can view license information, including expiration dates and available features.
To manage licenses in the Enterprise Portal:
1. In the Enterprise Portal, go to **License**.
1. Under **License Details**, view license information including the expiration date, status, associated release channels, custom license fields, and more.

[View a larger version of this image](/images/enterprise-portal-license-details.png)
## Manage team settings
This section includes information about how to manage users, service accounts, and SAML authentication in the Enterprise Portal.
### Invite or delete users
Customers can invite additional users to the portal and manage their access.
To manage invite and manage users in the Enterprise Portal:
1. In the Enterprise Portal, open the user account dropdown in the top right of the page and select **Team settings**.

[View a larger version of this image](/images/enterprise-portal-user-account.png)
1. Click **Users**.
1. Manage users as desired:
* To invite a new user, click **Invite user**.
* To delete a user, find the target user in the table and open the menu. Select **Delete user**.
### Manage service accounts
To manage service accounts in the Enterprise Portal:
1. In the Enterprise Portal, open the user account dropdown in the top right of the page and select **Team settings**.

[View a larger version of this image](/images/enterprise-portal-user-account.png)
1. Click **Service accounts**.
1. Manage service accounts as desired:
* To create a new service account, click **Create Service Account**.
* To view a service account token, find the target service account in the table and click **View** under **Token**.
* The revoke a service account's token, find the target service account in the table and open the menu under **Actions**. Select **Revoke**.
### Configure SAML authentication (Alpha) {#saml}
:::note
SAML Authentication to the Enterprise Portal is Alpha and subject to change. To access this feature, a feature flag must be enabled for your team. For more information, reach out to your Replicated account representative.
:::
:::note
SAML authentication must be enabled for the customer in the Vendor Portal before they can configure SAML for their Enterprise Portal team. For more information, see [Enable SAML Authentication (Alpha)](enterprise-portal-invite#enable-saml).
:::
To configure SAML authentication for your account:
1. In the Enterprise Portal, open the user account dropdown in the top right of the page and select **Team settings**.

[View a larger version of this image](/images/enterprise-portal-user-account.png)
1. Click **SAML Authentication**.
1. For **Service provider information**, copy the values provided and use them to configure your identity provider (IdP).

[View a larger version of this image](/images/enterprise-portal-saml-sp-info.png)
1. Upload the required metadata XML and public certificate from your IdP.

[View a larger version of this image](/images/enterprise-portal-saml-config.png)
1. After the file upload is complete, the **Enable SAML authentication** toggle is automatically enabled.

[View a larger version of this image](/images/enterprise-portal-saml-enable.png)
:::note
If you disable SAML authentication, the SAML configuration details that you added to the Enterprise Portal are saved.
:::
## Manage user settings
Each user can manage their settings in the Enterprise Portal, including enabling and disabling email notifications for various system events.
To manage user settings in the Enterprise Portal:
1. In the Enterprise Portal, open the user account dropdown in the top right of the page and select **User settings**.

[View a larger version of this image](/images/enterprise-portal-user-account.png)
1. Edit the user settings as desired:
* Edit profile information
* Manage email notification preferences
## Collect, upload, and manage support bundles
End customers can use the portal to collect, upload, and manage support bundles.
To manage support bundles in the Enterprise Portal:
1. In the Enterprise Portal, go to **Support**.

[View a larger version of this image](/images/enterprise-portal-support.png)
1. Manage support bundles as desired:
* For **Support Bundle Collection**, follow the instructions provided to collect a support bundle based on the environment.
* To upload a support bundle, click **Upload support bundle**.
* To view, download, or delete previous support bundles, select **Download** or **Delete** in the **Support Bundles** table.
[View a larger version of this image](/images/enterprise-portal-manually-create-air-gap-instance.png)
## View release history
To view the release history in the Enterprise Portal:
1. In the Enterprise Portal, go to **Release History**.
1. In the **Version History** panel on the left, select a version to view details about the given release.
## View license details
Customers can view license information, including expiration dates and available features.
To manage licenses in the Enterprise Portal:
1. In the Enterprise Portal, go to **License**.
1. Under **License Details**, view license information including the expiration date, status, associated release channels, custom license fields, and more.

[View a larger version of this image](/images/enterprise-portal-license-details.png)
## Manage team settings
This section includes information about how to manage users, service accounts, and SAML authentication in the Enterprise Portal.
### Invite or delete users
Customers can invite additional users to the portal and manage their access.
To manage invite and manage users in the Enterprise Portal:
1. In the Enterprise Portal, open the user account dropdown in the top right of the page and select **Team settings**.

[View a larger version of this image](/images/enterprise-portal-user-account.png)
1. Click **Users**.
1. Manage users as desired:
* To invite a new user, click **Invite user**.
* To delete a user, find the target user in the table and open the menu. Select **Delete user**.
### Manage service accounts
To manage service accounts in the Enterprise Portal:
1. In the Enterprise Portal, open the user account dropdown in the top right of the page and select **Team settings**.

[View a larger version of this image](/images/enterprise-portal-user-account.png)
1. Click **Service accounts**.
1. Manage service accounts as desired:
* To create a new service account, click **Create Service Account**.
* To view a service account token, find the target service account in the table and click **View** under **Token**.
* The revoke a service account's token, find the target service account in the table and open the menu under **Actions**. Select **Revoke**.
### Configure SAML authentication (Alpha) {#saml}
:::note
SAML Authentication to the Enterprise Portal is Alpha and subject to change. To access this feature, a feature flag must be enabled for your team. For more information, reach out to your Replicated account representative.
:::
:::note
SAML authentication must be enabled for the customer in the Vendor Portal before they can configure SAML for their Enterprise Portal team. For more information, see [Enable SAML Authentication (Alpha)](enterprise-portal-invite#enable-saml).
:::
To configure SAML authentication for your account:
1. In the Enterprise Portal, open the user account dropdown in the top right of the page and select **Team settings**.

[View a larger version of this image](/images/enterprise-portal-user-account.png)
1. Click **SAML Authentication**.
1. For **Service provider information**, copy the values provided and use them to configure your identity provider (IdP).

[View a larger version of this image](/images/enterprise-portal-saml-sp-info.png)
1. Upload the required metadata XML and public certificate from your IdP.

[View a larger version of this image](/images/enterprise-portal-saml-config.png)
1. After the file upload is complete, the **Enable SAML authentication** toggle is automatically enabled.

[View a larger version of this image](/images/enterprise-portal-saml-enable.png)
:::note
If you disable SAML authentication, the SAML configuration details that you added to the Enterprise Portal are saved.
:::
## Manage user settings
Each user can manage their settings in the Enterprise Portal, including enabling and disabling email notifications for various system events.
To manage user settings in the Enterprise Portal:
1. In the Enterprise Portal, open the user account dropdown in the top right of the page and select **User settings**.

[View a larger version of this image](/images/enterprise-portal-user-account.png)
1. Edit the user settings as desired:
* Edit profile information
* Manage email notification preferences
## Collect, upload, and manage support bundles
End customers can use the portal to collect, upload, and manage support bundles.
To manage support bundles in the Enterprise Portal:
1. In the Enterprise Portal, go to **Support**.

[View a larger version of this image](/images/enterprise-portal-support.png)
1. Manage support bundles as desired:
* For **Support Bundle Collection**, follow the instructions provided to collect a support bundle based on the environment.
* To upload a support bundle, click **Upload support bundle**.
* To view, download, or delete previous support bundles, select **Download** or **Delete** in the **Support Bundles** table.